Bakery Menu Photos: Show the Pastry You Actually Sell
To produce effective bakery menu photography, operators must visually separate single-item portion shots, cut-open cross-sections, and ambient display-case images. In digital ordering, the most frequent customer misunderstanding with baked goods stems from portion ambiguity: menu photos displaying three croissants when an order contains one, or an intact golden pastry that gives no indication of its interior fruit or custard filling.
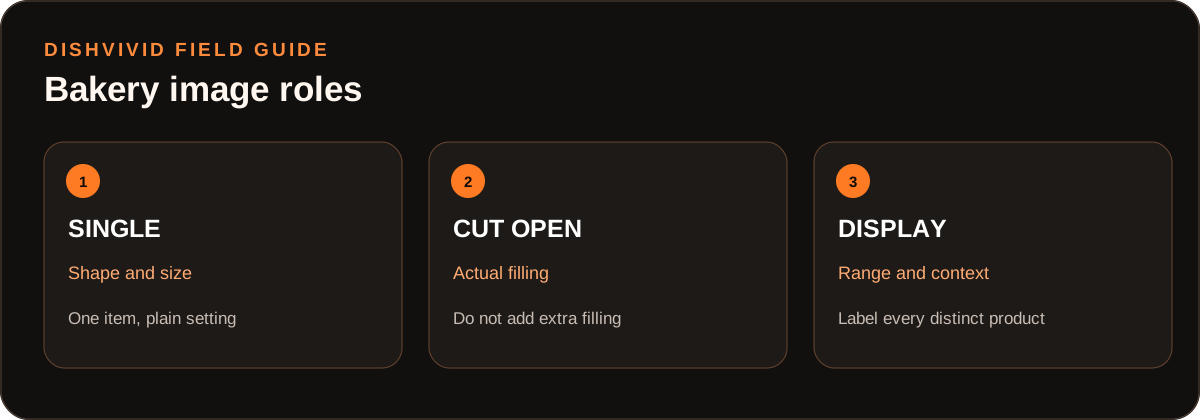
Editorial diagram for planning; it is not a customer photo or measured result.
The direct bakery-side solution follows three foundational practices:
- Dedicate primary listings to single retail portions: Photograph exactly what one customer purchase includes—a single croissant, one tart, or an explicit multi-pack—framed with intentional negative space to define scale.
- Use cut-open secondary shots for filled items: Whenever a pastry conceals a core component (frangipane, fruit compote, chocolate ganache, or cream), provide a clean, sliced cross-section to confirm filling density and internal crumb texture.
- Restrict display-case photos to branding surfaces: Keep wide multi-item showcase images on your homepage, category banners, or story pages. Never attach a multi-item display photo to an individual menu SKU.
By standardizing this visual separation, bakeries set honest customer expectations, eliminate surprise at pickup or delivery, and showcase artisanal baking quality without deceptive staging.
The Three Core Pastry Shot Types: Roles and Visual Boundaries
Every bakery menu requires distinct photographic assets to serve different stages of the ordering decision. Blurring these shot types confuses customers and increases fulfillment friction.
1. The Single-Item Hero (The Ordering Anchor)
The primary listing photo for any pastry must depict exactly one retail serving. Captured at a 30- to 45-degree angle under soft, directional light, this image communicates external crust color, lamination height, surface toppings (such as toasted almonds or pearl sugar), and finished bake quality. It answers the diner’s primary question: What physical item will arrive in my bakery box?
2. The Cut-Open Interior View (The Ingredient Clarifier)
Pastries with enclosed fillings—croissants, eclairs, Danish pastries, and hand pies—present an operational hurdle: a plain exterior looks identical whether the pastry is plain butter or filled with almond cream. A cut-open shot, taken with a straight, serrated cut, reveals lamination cell structure and filling volume. In delivery menus, this secondary photo validates the price premium of specialty baked goods.
3. The Multi-Item Case or Spread (The Atmosphere Builder)
Display cases stacked with baguettes, sourdough loaves, and tiered pastry trays convey abundance and morning freshness. However, when used as an item-level menu photo, customers frequently assume they are ordering an assortment. Reserve multi-item shots for collection headers, catering menus, or landing pages.
According to DoorDash merchant photography guidance, menu photos should clearly represent the single item being ordered, using accurate portion sizes and clean backgrounds to avoid customer confusion. Operators shooting in morning daylight can also review our guide on natural light food photography to balance sunlit bakery counters without washing out delicate powdered sugars or creating harsh counter shadows.
Pastry Shot and Label Matrix
To determine which image type and verification standard each bakery product requires, use this operational matrix during shoot planning.
Editorial Illustration: Practical Pastry Shot and Label Matrix (Hypothetical Framework)
| Pastry Category | Primary Image Type & Angle | Required Secondary Shot | Portion Verification Rule | Customer Confusion Risk & Fix |
|---|---|---|---|---|
| Filled Viennoiserie (e.g., Almond, Pain au Chocolat) | Single item at 45° showing exterior crust, height, and garnish. | 90° cross-section cut showing filling layer thickness and crumb. | Must show exactly 1 pastry; reject stacked multi-item pyramids. | Risk: Customer expects plain pastry or multiple units. Fix: Label as "Single Item" and show filling clearly. |
| Open-Faced Pastries & Tarts (e.g., Fruit Tart, Galette) | Overhead (90°) or 45° angle highlighting fruit arrangement and glaze. | Close-up 30° edge shot showing crust thickness and cream base. | Show standard retail diameter on a plain, neutral plate. | Risk: Distorted scale makes personal tart look family-sized. Fix: Include subtle scale reference (standard saucer or napkin). |
| Assortment Boxes & Packs (e.g., Half-Dozen Cookie/Pastry Box) | 45° overhead view inside the actual retail box or branded tray. | Flat lay of individual items arranged neatly side-by-side. | Show exact piece count matching menu description (e.g., precisely 6 units). | Risk: Customer expects custom selection or larger count. Fix: Note exact flavor breakdown in title and caption. |
| Display-Case Ambient (Full counter showcase) | Wide eye-level or 30° perspective of organized pastry case. | Not applicable for item-level menu SKUs. | Banner or category header only; never link to single item checkout. | Risk: A single-item listing looks like a multi-item order. Fix: Restrict use to category landing page banners. |
| Slices of Loaf Cakes & Tea Breads | Single upright slice at 45° with slight view of loaf contour. | Whole loaf placed softly blurred in distant background. | Single serving thickness matches standard cutting guide. | Risk: Customer assumes order is for a whole loaf. Fix: Title as "Individual Slice" and crop tightly to slice. |
A Practical Bakery Capture Workflow: Step-by-Step
Shooting baked goods requires strict physical discipline. Unlike savory dishes that can be re-sauced, delicate pastries flake, collapse, or dry out quickly under studio conditions.
Step 1: Production Batch Selection
Do not bake an artificial "oversized" sample for photography. Select two or three pastries from a standard commercial production run that represent your target color, oven spring, and finishing standards. Using an unusually large or heavily filled pastry will lead to customer disappointment when daily counter items fail to match the photo.
Step 2: Clean Cutting and Crumb Control
For cut-open shots, slicing technique determines whether the image looks appetizing or mangled. Use a long, sharp serrated bread knife with a gentle sawing motion—never press down vertically, which crushes flaky lamination layers. Wipe the blade clean between cuts to prevent filling smears across the pastry crust. Brush away chaotic loose crumbs with a small pastry brush, leaving only three to four natural crumbs nearby to suggest authentic flakiness.
Step 3: Directional Lighting and Crust Texture
Baked goods rely on directional lighting to highlight surface textures: golden blisters on croissants, cracked crusts on rustic loaves, or caramelized sugar edges. Position your primary light source at 75 to 90 degrees to the side, slightly elevated. This side-lighting casts micro-shadows into crust crevices, accentuating flaky layers and crisp edges without overexposing pale dough.
Worked Example: Photographing an Almond Croissant
(Hypothetical Worked Example)
Consider a hypothetical bakery menu item: the Artisan Almond Croissant, a twice-baked croissant filled with almond frangipane cream, topped with toasted sliced almonds, and dusted with powdered sugar.
The Problem
The bakery's initial smartphone photo featured three croissants stacked on a wooden cutting board in front of an espresso machine. The shot created two major operational issues: customers on delivery apps regularly ordered the item assuming they were receiving a three-pack, and those who received a single croissant complained they did not realize it contained a heavy almond filling, mistaking it for a plain butter croissant garnished with nuts.
The Correction Process
- Single-Portion Primary Shot: The team placed one fresh almond croissant on a neutral matte ceramic plate. The camera was set at a 40-degree angle to capture the overall crescent shape, vertical puff, and even distribution of sliced almonds.
- Dedicated Cross-Section Secondary Shot: A second croissant from the same batch was sliced cleanly across its midpoint. The cut half was stood upright beside the intact half, clearly revealing the creamy frangipane interior and golden lamination pockets.
- Rejection of Staged Fillers: The team deliberately rejected adding loose almond bowls, whole nuts, or syrup drizzles around the plate. The photo depicted solely what leaves the counter in the customer's bag.
Digital Review and Calibration
In this hypothetical workflow, the operator would load the raw capture into DishVivid Studio for minor exposure adjustment and a 1:1 square crop. The bakery team would then compare the image with the physical pastry under neutral light and reject any edit that changed its actual baked color.
Common Failure Modes and Practical Trade-Offs
When photographing bakery items, balancing styling with reality involves clear trade-offs:
- The Display Case Shortcut: Using a single photo of your front glass showcase for every pastry SKU saves photography time, but causes customer confusion, and can misrepresent the item sold. Decision: Photograph individual items individually; reserve case shots for your website hero section.
- Crumb Management vs. Sterile Staging: Complete removal of every flake makes pastries look artificial, like wax display replicas. Conversely, an avalanche of loose crumbs makes the plate look dirty. Rule: Leave 3–5 delicate flakes near the base, but clean all powdery buildup from the plate rim.
- Hot vs. Room Temperature Fillings: Slicing pastries straight from the oven causes warm fillings like chocolate, fruit compote, or cheese to liquefy and run uncontrollably across the surface. Solution: Cool filled pastries according to the recipe before slicing so the internal filling maintains structural integrity on camera.
- Artificial Shine Sprays: Commercial aerosol glazes create an exaggerated, plastic sheen that does not reflect real butter. Rule: Rely strictly on your authentic egg wash or sugar syrup glaze as baked.
Bakery Menu Photo Pre-Publish Checklist
Before uploading pastry images to your digital menu or third-party delivery profiles, verify each standard:
- Portion Clarity: Primary image features exactly one retail serving, unless explicitly sold as a multi-pack.
- Interior Disclosure: All enclosed fillings (creams, jams, chocolate) are visible via a cut-open secondary photo.
- Production Standard: Pastry photographed represents standard production size, height, and fill level—not an oversized custom sample.
- Clean Cut: Cross-sections show crisp, uncompressed lamination layers sliced with a clean serrated knife.
- Texture Definition: Directional side lighting reveals crust flake and browning without harsh glare or blown-out powdered sugar.
- Truth Verification: Final image reviewed against the physical counter product for a final accuracy check.
Sources
- DoorDash Merchant Blog: Menu Photography Best Practices and Requirements
- DishVivid Knowledge Base: Restaurant Menu Photography Resource Center