Cocktail Menu Photos Without Glass Glare
Capturing clean cocktail menu photos without blinding glass glare requires shaping your light source, positioning illumination from the side or rear rather than the front, and photographing the drink soon after pouring, before the appearance changes. For restaurant and bar operators, effective cocktail menu photography must reveal the liquid's true color and garnish placement without creating specular white blowouts that obscure the beverage. Managing reflections on curved glassware comes down to controlling the angle and size of your light, maintaining pristine glass surfaces, and preserving the exact recipe portion served to guests.
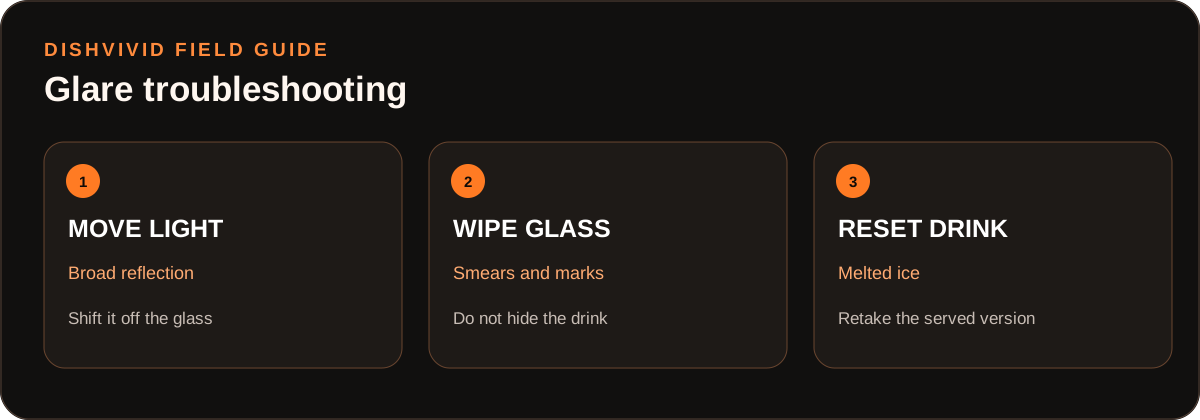
Editorial diagram for planning; it is not a customer photo or measured result.
The Physics of Bar-Side Glare: Why Point Lights Fail
Curved glassware acts like a wide-angle mirror. When you illuminate a highball, coupe, or rocks glass with a direct, concentrated light—such as an overhead dining room spotlight, a bare bulb, or an on-camera smartphone flash—the light bounces directly into your camera lens as an intense white hotspot. This hotspot blows out highlight details, washes out the drink's natural tone, and creates distracting flares across the rim.
To control reflections without altering the glass, operators must change the shape and position of the light:
- Broaden the Light Source: Diffuse directional light by placing a sheer scrim, translucent white sheet, or large piece of tracing paper between the light and the glass. A broad, diffused light produces a soft, elongated gradient along the curve of the glass rather than a piercing white pinprick.
- Move to Side or Rear-Quarter Angles: Position your primary light source at roughly 45 to 90 degrees to the side or behind the cocktail. Backlighting shines through translucent liquids, illuminating rich ambers, rubies, and citrus tones without shining directly on the front surface of the glass facing the lens.
- Use Passive Fill Instead of Second Lights: Place a clean piece of white foam core on the shadow side of the drink. This bounces gentle fill light back into the glass without adding a second glaring reflection.
Glass Reflection Troubleshooting Table
The following matrix provides a bar-side diagnostic flow for identifying common reflection defects and correcting them while preserving menu accuracy.
(Note: The matrix below is an editorial illustration created to guide restaurant operators during menu prep; it does not represent customer case data.)
| Reflection & Glare Issue | Root Cause | Bar-Side Physical Correction | Menu Accuracy Guardrail |
|---|---|---|---|
| Hard White Hotspots | Small, direct point light or smartphone flash reflecting off curved glass | Move light to a 45° rear angle and diffuse with a white scrim or sheer panel | Use the establishment's standard glassware; do not apply matte chemical dulling sprays |
| Greasy Smears & Streaks | Fingerprints, bar towel lint, or rinse-aid residue reflecting ambient light | Wipe dry glassware with a lint-free microfiber cloth; handle by stem or base with clean cloth | Ensure glassware cleanliness without altering glass etchings or branded logos |
| Heavy Droplet Runoff | Cold cocktail sitting in a warm, humid room, producing dripping condensation | Wipe glass exterior dry right before shooting; capture promptly after pouring | Do not spray glass with glycerin mixtures to fabricate artificial, permanent moisture beads |
| Muddy, Opaque Color | Front-heavy lighting reflecting off outer glass while liquid interior stays dark | Add backlighting to transmit light through the liquid from behind the glass | Accurately show natural liquid opacity; never add artificial food colorings to thin drinks |
| Volume Drift & Air Gaps | Ice melting and drink settling during an extended shooting setup | Setup camera, background, and lighting first; prepare and pour the cocktail last | Maintain house ice-to-liquid ratio; do not pack excess ice to fake a fuller pour |
| Rim Flare on Garnish | Staged extra fruit or herbs protruding past the rim and catching stray light | Tuck garnish cleanly into its standard service position along the rim | Reject non-standard double garnishes; display only what the kitchen or bar pours |
Step-by-Step Bar-Side Capture Sequence
A dependable shooting sequence minimizes turnaround time and prevents beverage degradation under lights:
- Preset the Station: Set up your backdrop, bounce cards, and diffused lighting before pouring the drink. Check camera framing and lock focus on a stand-in glass to avoid wasting time once ice touches liquid.
- Inspect and Polish Glassware: Inspect the dry glass under bright light. Remove water spots, fingerprints, and lint with a clean microfiber cloth. Handle the glass strictly by the stem, foot, or base.
- Build to Service Specification: Have the bartender prepare the drink according to the standard recipe card. Do not alter portion sizes, substitute larger ice molds unless standard, or add unapproved decorative elements.
- Position Backlighting and Angle: Check the camera preview. If glare appears across the center of the glass, shift your camera angle 5 to 10 degrees left or right, or raise your tripod slightly to throw the reflection away from the lens.
- Shoot Within 90 Seconds: Capture hero frames immediately. Ice and condensation change with room conditions; review the fill line and glass before each shot.
Platform guidance from the DoorDash Merchant Menu Photography Guide emphasizes that clean lighting and photographing dishes immediately after assembly are fundamental to presenting items accurately on digital ordering menus.
Worked Example: Citrus Highball (Hypothetical Menu Item)
(Note: The following example is a hypothetical menu item created by the DishVivid Editorial Team for illustrative training purposes, not a real restaurant test.)
Consider a classic Citrus Highball: 1.5 ounces of spirit, 4 ounces of club soda, standard cubed ice, and a single lemon wheel inside a 10-ounce clear Collins glass.
When staging this drink, operators often face the temptation to over-style: adding a second lemon wheel, stacking extra ice above the rim, or inserting a mint bouquet to make the photo look fuller. This practice misleads guests regarding portion size and introduces additional surfaces that catch stray light and cause glare.
In an accurate workflow:
- The drink is built with the exact house ice count and poured to the standard 0.75-inch wash line below the rim.
- A single lemon wheel is tucked flat against the inside wall of the glass as served.
- A diffused daylight source or soft LED panel is positioned at the rear-right (135 degrees relative to the camera), sending light through the pale carbonated liquid to showcase effervescence.
- A white bounce card on the front-left fills shadows along the garnish without introducing a secondary white glare streak.
- The photographer captures the shot promptly after the pour, capturing crisp bubbles before condensation streaks the outer wall.
Operational Trade-Offs and Failure Modes
Balancing visual polish against operational realities involves clear trade-offs:
- Ambient Bar Mood vs. Color Fidelity: Moody bar lighting creates ambiance for diners, but low-light tungsten fixtures introduce heavy yellow casts and digital noise. Photograph drinks during daytime prep near an indirect window or with a neutral continuous light. For fundamental lighting principles, consult our broader menu photography guides on the DishVivid blog.
- Light Condensation vs. Obscuring Droplets: A subtle cold sheen conveys refreshing qualities, but excessive condensation creates dark streaks and blurs the contents. Wipe the glass dry immediately before shooting rather than allowing heavy droplets to form.
- Reviewing Captures in DishVivid Studio: After capturing your raw photos, operators can upload images to DishVivid Studio to make manual lighting, contrast, and crop adjustments. Studio tools can normalize exposure and center the frame, but they cannot restore details lost to severe specular glare. When evaluating optional AI image candidates, always compare the preview against the physical drink and reject any version that alters fill lines, ice clarity, or garnish counts.
Operator Pre-Publish Checklist
Before uploading cocktail imagery to your digital menu or point-of-sale platform, verify the following standards:
- Light source is diffused and positioned to the side or rear, avoiding front-facing flash.
- No hard white specular hotspots obscure the drink's nameplate features or garnish.
- Glass exterior is free of fingerprints, smudges, and heavy condensation streaks.
- Liquid level accurately matches the standard recipe wash line served to customers.
- Garnish type and count match the kitchen and bar build sheet exactly.
- Ice type and fill level reflect the physical serving portion without exaggeration.
- Final framing reviewed in DishVivid Studio against the original serving glass.
Sources
- DoorDash Merchant Menu Photography Guide — Primary platform guidance on lighting, framing, and honest dish representation for digital ordering menus.