Pizza Menu Photos: Whole Pie, Slice, and Delivery Box
When setting up pizza menu photography for online menus and delivery apps, framing must match the exact unit the customer receives. If you sell a pizza as a complete whole pie, your primary hero photo must show the entire pie—uncut or sliced in its full circular format—to communicate true diameter, crust-to-sauce proportions, and topping distribution. If you sell by the slice, the primary image must frame the individual slice to showcase crust thickness, crumb structure, and cheese depth. Reserving dramatic single-slice pulls or delivery box packaging for secondary images helps customers understand what the listing includes.
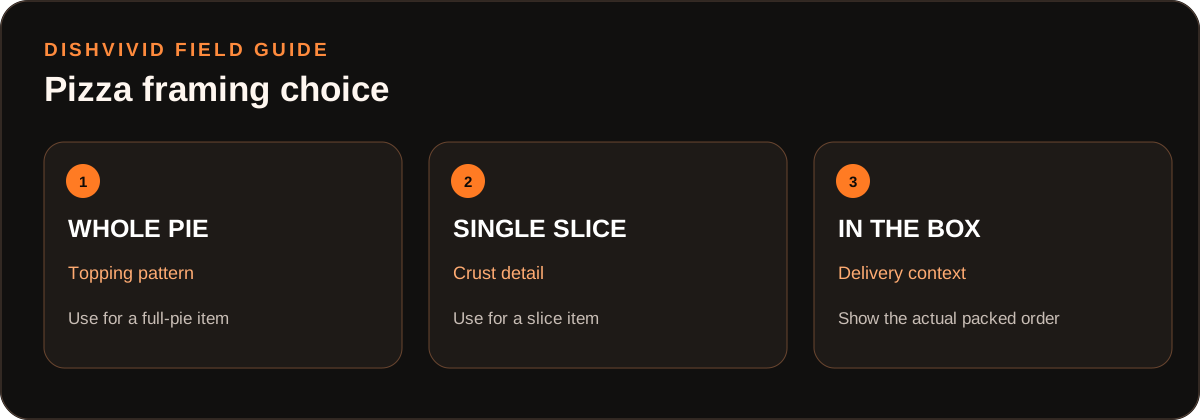
Editorial diagram for planning; it is not a customer photo or measured result.
Structuring effective pizza menu photography requires operators to establish clear framing rules based on purchase mechanics, thermal timing, and packaging condition before firing the oven.
When to Frame the Whole Pie, Slice, or Delivery Box
Operators often struggle between showcasing a wide shot of a full pie and an appetizing close-up of a lifted slice. Choosing the right frame requires matching the image directly to what the customer orders:
- The Complete Whole Pie: The required primary image for items sold as an entire pizza (such as a 10-inch personal, 12-inch medium, or 16-inch large). A complete pie shot gives diners an honest representation of diameter, edge-to-edge topping density, and crust rim ratio. Using a single slice for a whole specialty pizza leaves customers uncertain about overall portion size.
- The Individual Cut Slice: The required primary image for slice counters, combo lunches, and late-night slice menus. A slice shot highlights the vertical cross-section: bottom crust crispness, air pockets in the crust rim, and the proportion between cheese and sauce. For pan styles such as Detroit, Sicilian, or deep dish, a slice shot communicates vertical height and caramelized cheese edges.
- The In-Box Delivery Presentation: A recommended secondary image for takeout and third-party delivery listings. Customers ordering off-premise care about how food travels. Staging an open delivery box demonstrates container fit, shows food-grade grease liners, and sets realistic expectations for crust steam retention during transit.
Pizza Framing Decision Tree
Use this decision matrix to determine the required primary frame and secondary supporting shots based on how each pizza item is sold.
(Editorial Illustration: Menu Framing Decision Flow for Pizza Operators)
| Menu Item Sold | Primary Hero Frame | Secondary Supporting Frame | Framing Rationale | Accuracy & Compliance Guardrail |
|---|---|---|---|---|
| Whole Pie (Dine-In or Delivery) | Complete whole pie (high-angle 60°–75° or 90° top-down) | 45° angle slice lift showing cheese stretch | Establishes pie diameter, crust rim ratio, and total topping distribution | Must depict the entire circular item; never use a single isolated slice as the sole hero image for a whole-pie listing. |
| Individual Slice (By-the-Slice) | Single slice on plate or paper (low 30°–45° angle) | 90° top-down view showing triangular shape | Showcases vertical crust height, crumb openness, and slice portion size | Frame must show the exact single slice served, not a full 8-slice pie that misleads on quantity. |
| Pizza Combo or Lunch Deal | Sliced portion alongside included side and drink (45° angle) | Overhead view of the complete combo tray | Clarifies all bundled elements and relative serving proportions | All bundled items must appear in realistic scale; avoid staging unincluded premium sides. |
| Delivery-First or Takeout Special | Whole pie seated in an open delivery box (60° high-angle) | Closed branded box with label or multi-box stack | Verifies packaging fit, steam venting, and transport presentation | Show real packaging liners; do not hide natural steam softening or minor topping settlement. |
Camera Angles and Lighting: Overhead vs. Three-Quarter Elevations
Pizza is a dimensional dish that demands deliberate camera elevation. Choosing the wrong angle can flatten a thick Sicilian crust into a disk or conceal the blistered rim of a Neapolitan pie.
High-Angle vs. Top-Down Overhead
A strict 90-degree overhead angle (flat lay) provides an accurate geometric view of topping placement, sauce distribution, and rim symmetry. However, flat overhead angles conceal crust height, making thick-crust pies appear identical to thin-crust varieties. A 60-degree to 75-degree high angle serves as the practical standard for whole pies: it preserves the circular profile while revealing raised crust edges, char blistering, and melted cheese texture. For broader perspective planning, consult our reference guide on food photography camera angles.
Low-Angle Elevation for Slices
When capturing an individual slice, lower the camera to 30 to 45 degrees. Position the lens perpendicular to the cut edge to reveal internal dough structure, cheese layer thickness, and sauce moisture. For Detroit or square pan pizzas, shoot near table level (15 to 30 degrees) to highlight the dark, caramelized cheese crust along the outer edges.
Controlling Cheese Sheen and Sauce Hotspots
Pizza combines reflective melted fat from cheese with glistening tomato sauce. Direct front-facing flash or harsh overhead spotlights produce blown-out white glare spots that obscure topping details. Place diffused lighting 45 to 90 degrees to the side or slightly behind the pizza. This back-quarter illumination accentuates the natural curvature of pepperoni cups and cheese texture without washing out color saturation.
Worked Example: Photographing a 12-Inch Pepperoni Pizza
(Note: The following example is a hypothetical menu item developed by the DishVivid Editorial Team for illustrative training purposes, not real customer case data.)
Consider a hypothetical menu offering: a 12-Inch Hand-Tossed Pepperoni Pizza, baked in a deck oven with whole-milk mozzarella, natural-casing pepperoni cups, and a garlic-herb crust rim, sold as a whole pie for dine-in and takeout.
The Problem
During photo staging, an operator might be tempted to photograph only an extreme close-up of a dramatic cheese pull from an isolated slice. While engaging on social media feeds, this image fails digital ordering standards: customers cannot evaluate whether the 12-inch pie serves one person or two, nor can they verify whether pepperoni coverage is uniform across the entire surface.
The Three-Step Capture Process
- Primary Hero Capture (Complete Pie): Slice the pie into its standard eight slices immediately upon removal from the oven. Keep all slices pushed tightly together so the circular shape remains intact. Mount the camera at a 65-degree high angle, positioning diffused lighting to the rear-left. Capture the full 12-inch pie on a neutral metal tray or wooden peel while it still resembles the pizza served to customers.
- Secondary Detail Frame (Authentic Cheese Pull): Using a standard serving spatula, lift one pre-cut slice 1.5 inches above the pie surface. Allow the warm mozzarella to stretch naturally. Do not insert toothpicks, cardboard props, or cold unbaked cheese to exaggerate the pull. Capture this frame at 45 degrees to show internal crust crumb and authentic cheese elasticity.
- Delivery Box Verification: Transfer a second freshly baked pie into your standard corrugated takeout box lined with food-grade parchment. Prop the lid open at a 45-degree angle. Photograph from a 60-degree elevation to demonstrate proper container sizing and verify that the crust rim does not crush against the cardboard lid.
Reviewing in DishVivid Studio
Upload raw captures to DishVivid Studio to center the circular pie within platform crop templates, normalize white balance, and balance shadows around dark blistered crust edges. If testing optional AI adjustments, evaluate the preview against the physical bake to ensure pepperoni count, cut lines, and crust blistering remain authentic to your kitchen build sheet.
Operational Trade-Offs and Delivery Packaging Pitfalls
Balancing kitchen speed with visual standards introduces practical trade-offs that operators must manage:
- The Staged Cheese Pull Illusion vs. Genuine Service: Commercial food styling often uses cosmetic glues or unbaked cheese to create towering 18-inch cheese pulls. On digital menus, this deceit can misrepresent the pizza sold. Rely on freshly melted mozzarella captured while the cheese still resembles the served pizza.
- Steam Condensation in Delivery Boxes: Trapping a piping-hot pizza inside a closed cardboard box causes steam to condense on the inside lid, dripping water onto the crust and clouding camera lenses. Use your normal kitchen venting process before staging the pizza inside its delivery box for an open-lid shot.
- Platform Image Standards: Official Uber Eats Merchant Photo Guidelines mandate that menu images accurately represent the specific dish served, use centered framing with appropriate margins, and avoid watermarks, promotional text overlays, or misleading staging.
Operator Pre-Publish Checklist
Before publishing pizza menu photos to your website or delivery platforms, verify each item against this checklist:
- Primary hero image reflects the exact purchase unit (full pie for whole-pie listings; single cut slice for by-the-slice items).
- Camera elevation captures both surface toppings and crust thickness (60°–75° for whole pies, 30°–45° for slices).
- Topping distribution, pepperoni density, and crust blister level reflect actual kitchen assembly sheets.
- Any secondary cheese-pull image uses genuine melted cheese without artificial stabilizers or props.
- Delivery box photos display actual packaging, liners, and realistic fit without misleading container alterations.
- Image is free of promotional borders, price text, logos, or artificial graphics.
- Raw exposures are inspected and cropped in DishVivid Studio to match physical service portions.
Sources
- Uber Eats Merchant Photo Guidelines — Official marketplace requirements covering honest item depiction, lighting, framing, and compliance standards for restaurant-submitted digital menu photos.
- DishVivid Menu Photography Resource Center — Educational guides on restaurant food photography workflows, lighting geometry, and visual menu optimization.