Burger Menu Photos: A Three-Frame Shot Plan
Restaurant operators photographing burgers for digital menus face a persistent technical challenge: overhead camera angles flatten stacked ingredients into unidentifiable circles, while aggressive commercial food styling tricks—such as wedging cardboard spacers between patties, undercooking beef to preserve volume, or clustering every pickle at the front edge—lead to a photo that misrepresents the served dish. Effective burger menu photography requires a structured, honest capture plan that communicates thickness, ingredient build, and packaging condition without distorting what comes off the kitchen line.
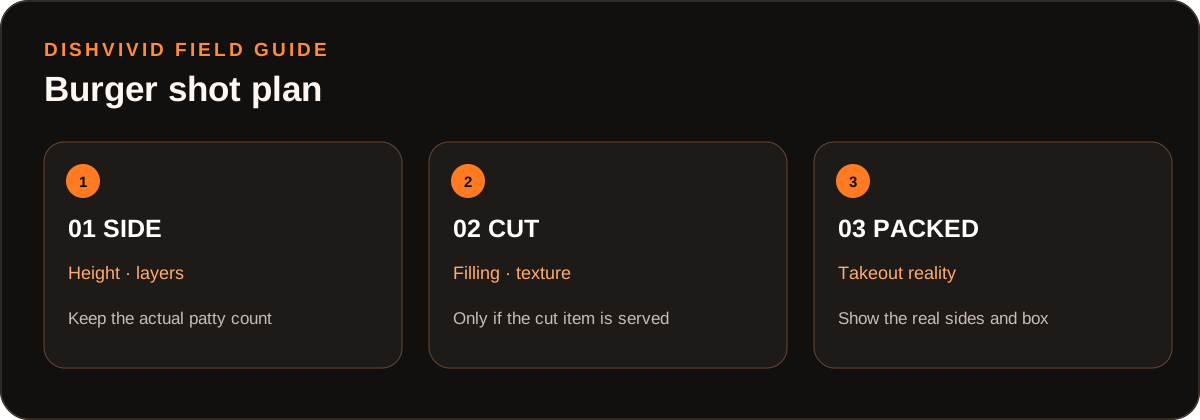
Editorial diagram for planning; it is not a customer photo or measured result.
A single photo rarely provides all the visual information a customer needs. Rather than taking unstructured snapshots during service, kitchen teams and operators can implement a standardized three-frame capture plan: a whole burger side elevation, a selective cross-section frame, and an in-box packaging frame. Each shot answers a specific ordering question while establishing an operational truth check on portion size and toppings.
The Three-Frame Burger Photography Matrix
Capturing a burger menu item across three defined frames establishes visual clarity across delivery platforms and website menus. The matrix below defines the camera elevation, staging criteria, and accuracy guardrails for each angle.
Editorial Illustration: Three-frame capture matrix for digital burger menus.
| Frame Type | Primary Customer Question | Camera Elevation & Angle | Staging Requirements | Portion & Truth Guardrail |
|---|---|---|---|---|
| 1. Side Elevation (Hero) | "How tall is the burger and what are its distinct layers?" | Eye level to table (10°–15° elevation) | Centered on a flat, neutral surface; top bun level; natural melt on cheese | Patty thickness must reflect actual cooked weight; toppings distributed evenly around perimeter. |
| 2. Cross-Section (Interior) | "What is the patty texture, doneness, and internal sauce spread?" | 30°–45° three-quarter elevation | Sliced cleanly with a serrated knife; resting on a flat surface; cut faces forward | Only use if the item is served cut or if interior layers require clarification; do not push rear ingredients forward. |
| 3. In-Box (Packaging) | "How does this burger actually arrive when ordered for takeout?" | 45° overhead-quarter elevation | Staged directly inside standard delivery container or wrapper with lid open | Real takeout packaging only; realistic bun moisture; no oversized side portions. |
Frame Mechanics: Side, Cross-Section, and Packaging
Frame 1: The Whole Burger Side Elevation
The side elevation serves as your primary menu thumbnail. Positioning the camera low—between 10 and 15 degrees above the tabletop—is essential for stacked items. A steep 45-degree or overhead angle captures only the top bun and sesame seeds, concealing patty thickness, cheese melt, and specialty toppings.
To stage this frame:
- Place the plate on a level surface with diffused side lighting (such as an indirect window or softbox placed at 90 degrees) to highlight surface textures without creating harsh hot spots.
- Keep the camera parallel to the burger's center line. If the top bun tilts naturally, align the camera to capture the most representative profile without artificially propping the bun with toothpicks.
- Ensure the bottom bun is visible. Sinking buns or wet lettuce pooling on the plate signal moisture issues that should be corrected on the line before shooting.
Frame 2: The Cut-Open Cross-Section
A cross-section frame communicates internal doneness, patty density, and sauce distribution. However, an operator must only deploy a cross-section when it reflects the actual food served. If a burger is sold as a whole unit, presenting a cross-section as the sole primary image can confuse customers about how the food arrives.
To shoot an honest cross-section:
- Let the cooked burger rest according to your kitchen service process, then cut through the center in one smooth motion using a sharp serrated knife. Avoid pressing down, which compacts the crumb of the bun and squeezes out sauces.
- Position the two halves slightly offset, angled at 30 to 45 degrees, allowing the camera to register both the flat interior cut and the exterior bun crust.
- Never push rear fillings toward the cut edge to create a false impression of density. The cross-section must show standard kitchen sauce portions and typical patty cook levels.
Frame 3: The In-Box Packaging Frame
Takeout and delivery customers experience food inside disposable packaging. During transport, steam softens bun crusts, and wrappers compress tall builds. Introducing an in-box frame bridges the gap between dine-in presentation and delivery reality.
- Stage the burger directly inside your restaurant's standard takeout container (such as a paperboard clamshell, compostable box, or foil liner).
- Fold container lids back or position wrappers naturally so the food remains the visual focal point while the packaging context remains obvious.
- For operators managing multiple takeout items, our guide to takeout food packaging photography outlines how to capture steam vents and structural containers cleanly without cluttering the frame. For broader menu setup strategies, refer to the DishVivid blog index.
Worked Example: Single-Patty Cheeseburger
Note: The following workflow illustrates a hypothetical standard menu item for editorial reference, not a customer case study.
Consider a standard menu offering: a Classic Single Cheeseburger consisting of one 4-ounce beef patty, one slice of American cheese, green leaf lettuce, one tomato slice, and house sauce on a toasted brioche bun, priced and sold à la carte.
- Standard Line Assembly: The kitchen prepares the burger using standard portion tools. The tomato slice is cut to standard prep thickness (approximately 1/4 inch), and the sauce is applied with a single calibrated 0.75-ounce ladle.
- Side Frame Execution: The operator mounts a smartphone on a mini-tripod at table height, approximately 18 inches from the plate. The lens is leveled with the seam between the top bun and patty. The frame captures the natural melt of the single cheese slice over the patty edge. Truth Check: No extra patty is added, and no unincluded french fry basket is placed in the background.
- Cross-Section Execution: The burger is halved. The shot confirms a medium-well beef interior and an even layer of sauce. Truth Check: Sauce is not drizzled onto the cut face post-slicing; the image depicts standard distribution.
- Packaging Frame Execution: The second half of the item is boxed in the standard brown kraft clamshell used for delivery orders. The camera shoots at a 45-degree angle to display how the burger fits within the container compartments.
Common Burger Staging Pitfalls and Truth Guardrails
Misrepresenting portion sizes in menu photos creates friction with customers and platform review teams. Avoid these standard food styling mistakes:
- Front-Loading Ingredients: Pushing all bacon, jalapeños, or onion rings to the front rim of the bun creates an illusion of double toppings. Arrange ingredients uniformly as specified in your kitchen training manual.
- Undercooking for Volume: Commercial studio photography often uses nearly raw patties to maintain maximum thickness. For digital restaurant menus, patties must be cooked to standard kitchen specifications. An image showing a rare, bright red core when your kitchen serves medium-well creates an immediate food safety and expectation mismatch.
- Cardboard and Pin Spacing: Placing cardboard discs between layers to increase height makes a burger look twice as tall in the photo as it appears in the customer's hands.
Platform documentation, such as the DoorDash Merchant Menu Photography Guide, stresses that clear lighting, uncluttered framing, and accurate depictions of fresh menu builds reduce ordering confusion and prevent item disputes.
Reviewing and Cropping in DishVivid Studio
Once raw frames are captured, operators can refine image parameters using DishVivid Studio. Post-capture adjustments should focus on technical clarity rather than cosmetic alteration:
- Exposure and Contrast: Adjust brightness so dark grill marks and deep beef tones do not clip into solid black, while preserving highlights on toasted buns and glossy sauces.
- Crop Ratios and Framing: Delivery platforms commonly require 1:1 square or 16:9 aspect ratios. In Studio, apply platform crop presets to confirm that the burger crown and plate boundaries have adequate margin and are not cut off by circular mobile thumbnails.
- Evaluating AI Candidates: If testing optional AI adjustments in Studio, compare any candidate image directly against your original camera capture. If an AI variant exaggerates patty thickness, adds unincluded toppings (such as sesame seeds to a plain bun), or removes realistic surface imperfections, reject the candidate in favor of the manual edit.
Operator Pre-Publish Checklist
Before uploading burger imagery to your online ordering system, confirm each item against this checklist:
- Height Profile: Side frame captured at 10°–15° elevation to show full layer height without overhead distortion.
- Portion Truth: Patty count, thickness, and topping volumes match the kitchen build guide exactly.
- Inclusion Check: No unbundled sides, dipping cups, or beverages appear in the frame unless sold as a combo.
- Cross-Section Validity: Cut-open photo accurately displays the standard cook temperature and internal distribution without manual repositioning.
- Packaging Transparency: In-box frame accurately depicts the physical takeout container and liner.
- Post-Processing Review: Images checked in DishVivid Studio to confirm framing margins and verify that color balance reflects the actual dish.
Sources
- DoorDash Merchant Menu Photography Guide — Official platform documentation on lighting setups, realistic menu item staging, and photo submission specifications.